Steps to Create a PDF with Crops & Bleeds
The following steps and illustrations below describe how to create a print-ready PDF with crop marks and bleeds are based on working in Adobe InDesign using a Mac. The steps are similar if using a PC with some possible minor variations.
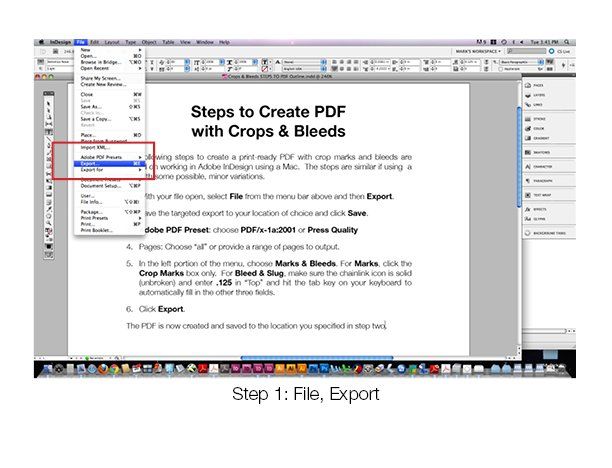
1 - With your file open, select File from the menu bar above and then Export.
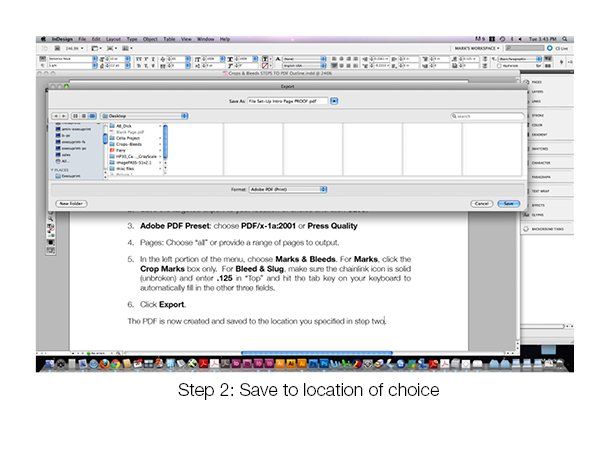
2- Save the targeted export to your location of choice and click Save.
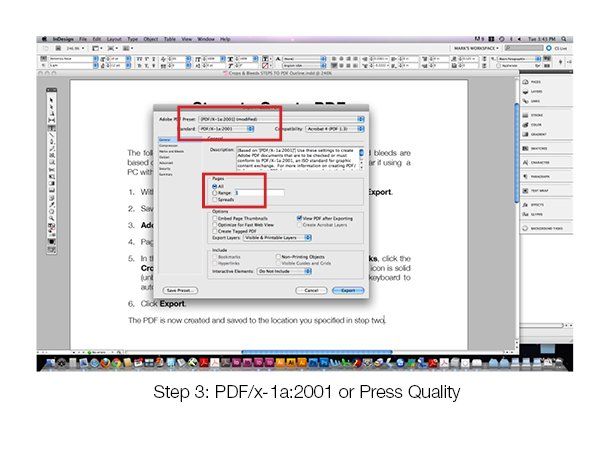
3 – Adobe PDF Preset: choose PDF/x-1a:2001 or Press Quality. For Pages: choose “all” or provide a range of pages to output.
4 – In the left portion of the menu, choose Marks & Bleeds. For Marks, clock the Crop Marks box only. For Bleed & Slug, make sure the chainlink icon is solid (unbroken) and enter .125 in “Top” and hit the tab key on your keyboard to automatically fill in the other three fields.
5 – Click Export.
The PDF is now created and saved to the location you specified in step two.